
My sprouting experimentation began years ago, once I’ve learned the immense benefits of sprouts for human health. Among my first attempts were broccoli and alfalfa seeds.
As it usually happens, I had the beginner’s luck and sprouted the alfalfa without breaking a sweat. Next time and every other seed I tried, turn out to be a drag. So I started buying the ready-made sprouts.
There is no harm in that. However, it still isn’t easy to find sprouts every time I want to embellish my salad or sandwich. A little bit of Google business showed me that my go-to solution is sprouting raw foods, instead of seeds!
Why? Because it’s easier! In my experience, sprouting grains or legumes is a walk in the park. The champion of the “how easy it is” category definitely are the mung beans, but let me sprout some more beans or grains and get back to you with possible updates.
So, mung beans are super-easy. So is buckwheat, it just needs a bit more time to start displaying the magic. Let’s go step by step on how to sprout buckwheat.

Step 1 – soak the buckwheat
Take the desired amount of the grain (mind not to overdo. They can’t be stored too long) and soak it into filtered water. Leave overnight.
Step 2 – Drain and store
The next day, the sprouting process can begin by rinsing the buckwheat in a strainer. After being soaked for hours, buckwheat produces certain gel-like mass, which will make the grains very sticky. Make sure to rinse this thoroughly, mixing with your hands until you’re sure the sticky overlay is gone.
Transfer the rinsed and drained grains into a jar. Remove the lid and place a cheesecloth instead.
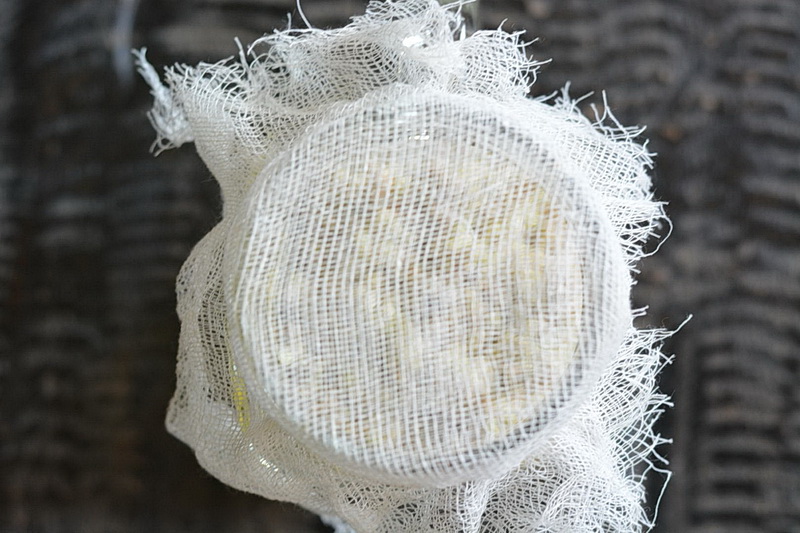
Store in a cool, dark place, like a closed cupboard. Don’t use the fridge.
Step 3 – more rinsing
During the next 3 days, nurture your buckwheat sprouts by rinsing them three times to four a day (every 6-8 hours). Fill the jar with filtered water and drain. After the rinsing, the jar should be moist but not containing water. Put back the cheesecloth and put the jar back into the cupboard.
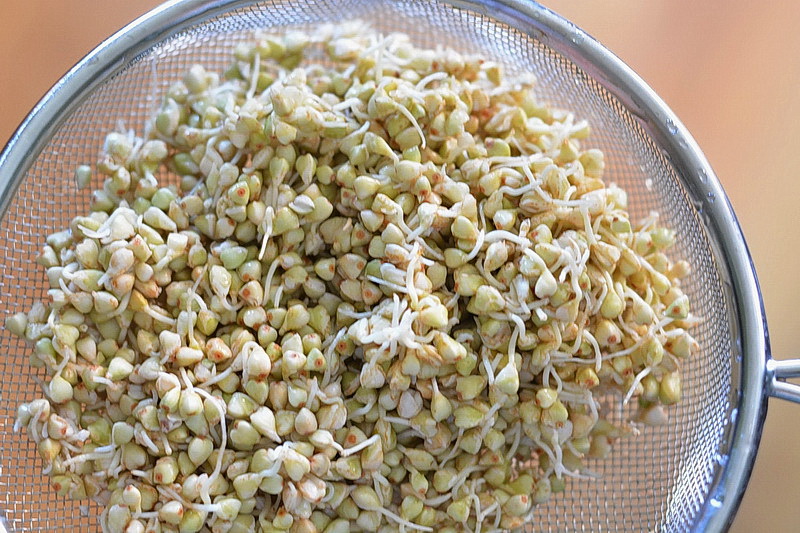
After the first day, you will notice some of the grains growing tails 🙂 Keep repeating step 3 and within 3 days in total, all of your buckwheat will be germinated.
Usage and storage
Store the sprouts in an air-tight container for up to one week. Enjoy its extremely mild, slightly nutty flavor which complements any salad or sandwich. Some people add it to smoothies, I must say I never tried that.
Final words:
- The total sprouting process may take up to 4 days. Sometimes they’re ready within 3 days, sometimes more. No matter the time, the process stays the same.
- If the buckwheat isn’t germinated within 4 to 5 days, the grains are probably not suitable. My recommendation is to sprout organic if you can.
- Neglecting will lead to moldy grains. This is how sprouts react if you don’t rinse them regularly or leave excess water in the jar.